In the Industrial Hygiene menu, click Survey.

Click a link to edit or copy an existing survey, or click New.

To copy a survey, open the source survey and choose Actions»Copy. The information on the Survey, Product, and Plan tabs will be duplicated.
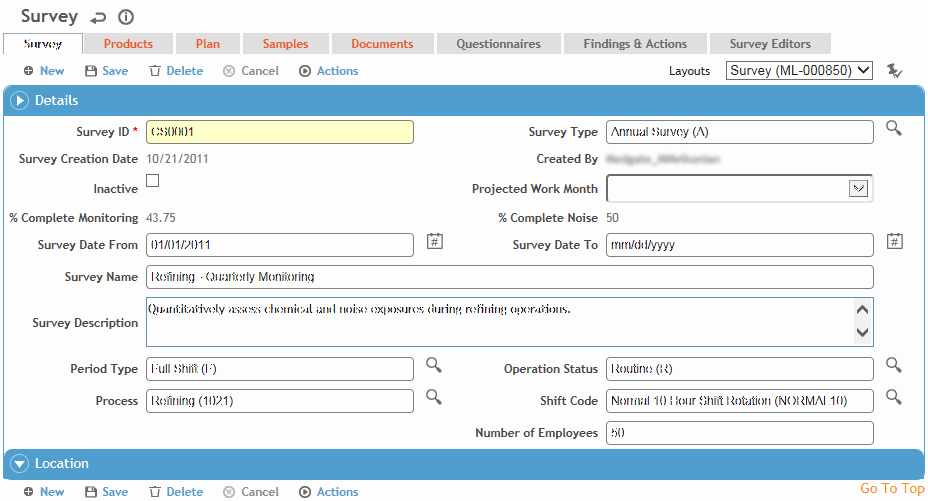
On the Survey tab:
Select a Survey Type and start date (Survey Date From). The end date (Survey Date To) defaults to the last day of the current year, but you can change this if required. When this date passes, the survey becomes locked, and the end date must be adjusted before further edits can be made. Only those who have been granted the IH Admin role in system settings can unlock an inactive or expired survey record.
Define the location where the survey is to take place.
The
% Complete is calculated based on the
number of samples attached to the survey (as shown on the Samples
tab) compared to the number of samples planned for the survey (as
defined on the Plan tab). If there is no plan defined, the %
Complete will remain blank. The %
Complete field can also be added to the Plan tab layout.
The “Survey % Complete Logic Based On” system setting determines if
the calculation includes all sample statuses (default) or approved
samples only.
Click Save.
Use the Products tab to identify any products that are related to the survey. Click a link to view the details of the product or any attached documents. For more information, see Viewing or Entering a Product.
Use the Plan
tab to manage the monitoring or noise monitoring sampling plans (e.g.
the agents to be sampled, or the type of noise monitoring planned).
If the survey was created from a risk assessment (see Creating
a Survey from a Risk Assessment Record), the plan(s) created include
an icon  . Click the icon to view the risk assessment's
Decision Analysis tab in a separate window (see Running
Traditional and Bayesian Statistical Analysis).
These are sampling plans only—the actual samples performed may contain different information.
In the appropriate section, do one of the following:
click a link to edit an existing plan, or
select the check box beside a plan and choose Actions»Copy, or
click New to create a new plan.
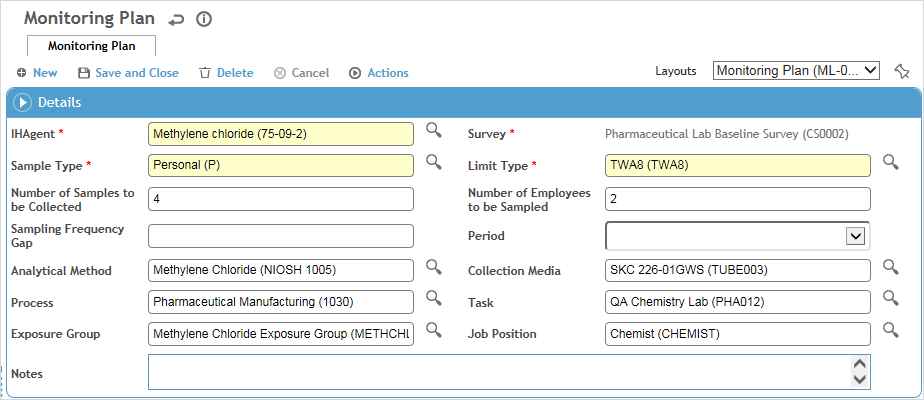
For Monitoring plans:

Select the Agent (if a new record), Sample Type and Limit Type.
Enter the Number of Samples to be Collected and Number of Employees to be Sampled, and define the Sampling Frequency (gap and period).
Select the Analytical Method (a default method may have been defined in the AgentHazard table) and Collection Media.
Click Save.
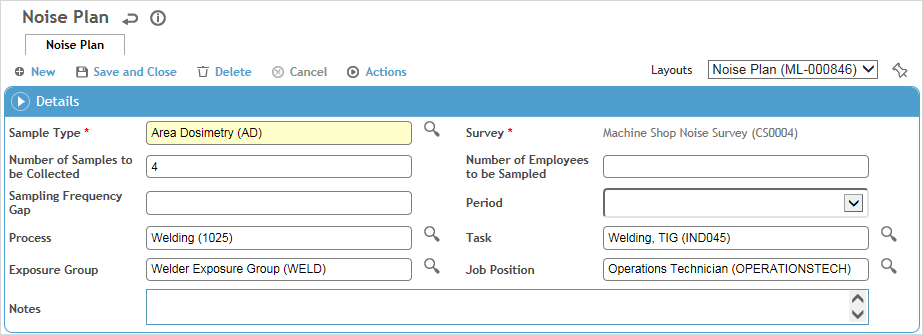
For Noise plans:

Select the Sample Type.
Enter the Number of Samples to be Collected and Number of Employees to be Sampled, and define the Sampling Frequency (gap and period).
Click Save.
To view the details of an agent in a Monitoring plan, select the record and choose Actions»View Agent Details. You can do this from the plan list or from within a plan.
To create a sample linked to a plan, select the plan it should be associated with, then choose Actions»Create New Sample. Some fields are populated with data from the parent survey and plan.
The Samples tab shows any samples that are linked to this survey. Different views allow you to also see the related Agent or Results in the list. To create a new sample linked to this survey, click New in the appropriate section. The Operation Status, Process, and GDDLOFB information is copied to the new sample when created from the survey. For information about completing the sample, see Recording a Monitoring Sample Record.
To generate a letter associated with a survey record, e.g. to notify employees of exposure results in their work area, select the samples you want to include, then choose Actions»Generate Letter from the appropriate section. Complete the letter as described in “Generating a Letter” on page 26-1. The body of the letter will include a table of results for the selected samples. The letter will be listed on the Letters tab.
The Documents tab allows you to import a file containing supporting information to the survey. Linking a file to the survey offers IH professionals working with the survey easy access to the file. For more information, see Linking or Importing a Document.
The Questionnaires tab allows you to associate questionnaires with a record. For information about creating and administering questionnaires, see Questionnaires.
Use the Survey Editors tab to identify which technicians are allowed to access this survey. By default, technicians (as defined in the Users table) can only view surveys they have created or were given editor rights to access.
The Letters tab displays all letters created for samples on the Samples tab.