Transferring Pulmonary Function Test Results from a Spirometer
There are two methods for obtaining test results from a spirometer. The method you will use is largely determined by which device you are using and if you are working in Windows XP or Windows 7 or 8:
-
To transfer data directly from newer devices connected to a Windows 7 or 8 computer, use the Cority Spirometric Import Engine which provides a separate Web interface for uploading test results into Cority. The program must be properly installed and configured with a user name, the URL for receiving test results, and the device activation key. Contact your Cority representative to obtain the application, log-in and activation credentials, and instructions.
-
To transfer data directly from a Benson CCS-200 spirometer, use the Benson Cloud software.
-
For older devices, you must run Cority in XP Mode and use the ActiveX control for the chosen spirometer interface add-on to import the data.
Refer to http://www.cority.com/software/technical-information/interfaces/ for the current list of supported devices. Before transferring test results, the type of equipment must be defined in the Equipment module (see Equipment) and in the system settings (see Changing Your System Settings).
If you use employees’ social security numbers on the spirometer instead of their employee number, the appropriate system setting should be set by your administrator so Cority can match the tests to the employees. See Changing Your System Settings for more information.
Using the Cority Spirometric Import Engine Transfer Program:
To transfer test results from a connected device:
-
In the Occupational Health menu, click PFT.
-
On the Pulmonary Tests list, choose Actions»Transfer from Spirometer.
Refer to the separate guide provided by your Cority representative.
Using the Benson Cloud software:
For help with any of the following steps, consult the Benson Cloud software documentation.
-
In the Benson Cloud software, navigate to the connection settings screen and enter the following URL:
<Site Root>/webservice/bensonspiroservice.svc
-
Enter your Cority username and password and click OK.
-
Perform your testing.
-
Using the Benson Cloud software, upload the test(s) into Cority. A pulmonary test record will be created for each test.
For device interface training, contact your Cority representative.
Using the XP Mode/ActiveX Control Import:
To transfer the test results electronically from the spirometer:
-
In the Occupational Health menu, click PFT.
-
On the Pulmonary Tests list, choose Actions»Transfer.
-
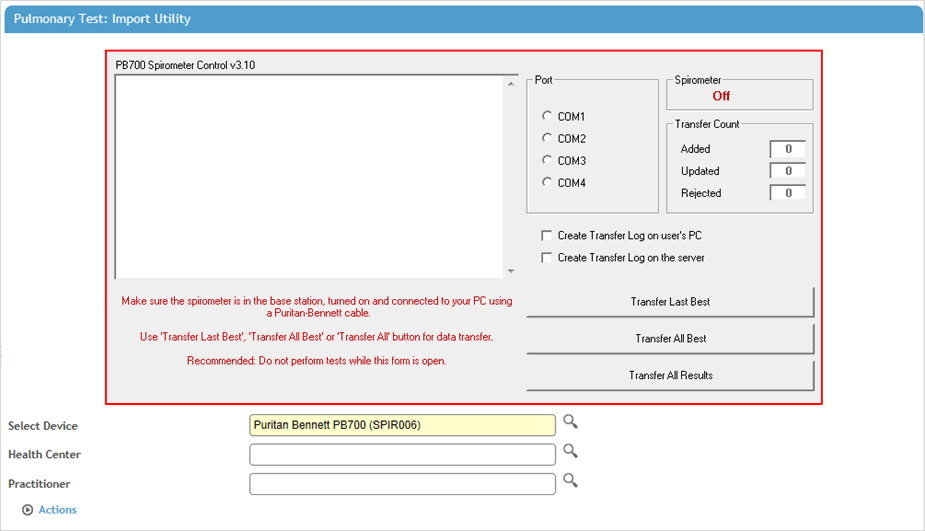
Select or change the import Device, and optionally identify the Health Center and Practitioner.
If this is the first time you have selected this spirometer, you will be prompted to install the ActiveX control for the spirometer interface add-on.
-
The Transfer window may appear different depending on the spirometer selected. Follow the instructions in the Transfer window to add the test results to the employees’ records.
-
Koko and OMI devices: Select the transfer file which you want to import.
-
EasyOne/PB700: To transfer just the best result for the test you are working on right now, click Transfer Last Best. To transfer all best tests in the spirometer, click Transfer All Best. To Transfer all results in the spirometer, click Transfer All.
-
Easy on-PC: To transfer the result of the best test only, select the Transfer Best Test check box.
-
PB100: Follow the instructions on the Transfer window. Use “Print/Send” button for data transfer.
-
Schiller SP10: Follow the instructions on the Transfer window. Press “Send Data” key to transfer results after tests are completed.
-
Spirotrac IV: Follow the instructions on the Transfer window. Press “Import” button to transfer results.
-
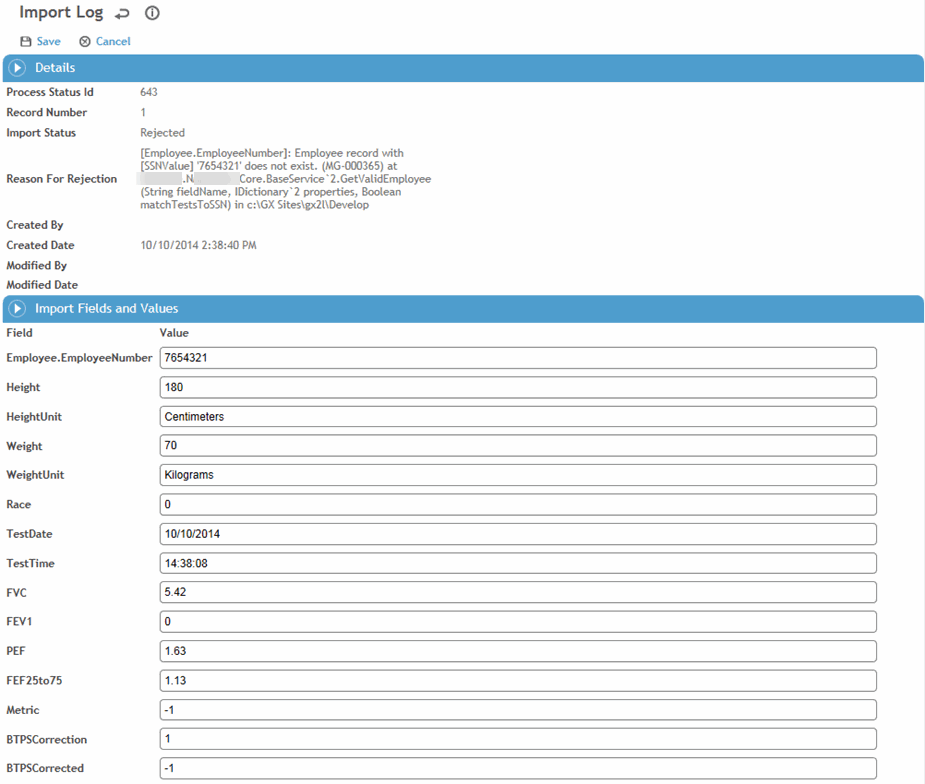
Some records may not be imported because the employee number is not found. To view the list of test results, including these rejected records, choose Actions»Process Status and Log.
-
Select a User ID link to see the records for that transfer process, then click an ID link to view and correct the values for a rejected record.
-
In the Pulmonary Test Transfer Log form, make any changes necessary and click Save.
-
Once the problems are corrected, choose Actions»Reprocess. View the log again to be sure all records have been saved.


