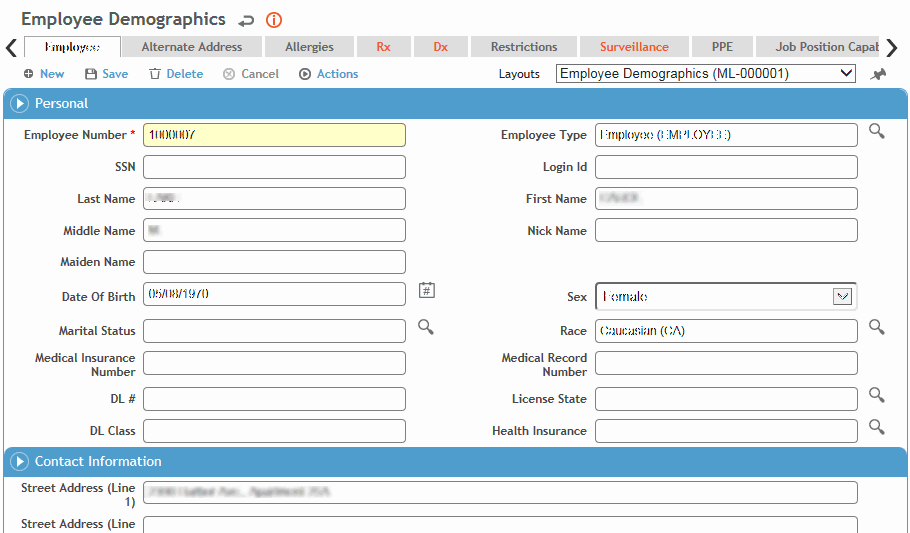
In the My Favorites menu, click Demographics.
Click a link to edit an existing employee record, or click New.

On the Employee tab, enter the employee’s personal and employment information. Most fields are self-explanatory, but you should know the following:
-
The Employee Number must be a unique identifier.To automatically generate the employee number, select the Employee Type and choose Actions»Create Employee #. The number is assigned a prefix and the next available number according to the sequence set in the EmployeeType look-up table.
-
In the Mail Stop field, enter the P.O. box number, e.g. WS 3E-75A.
-
If this employee has access to the Cority system, enter the user name in the Login ID field.
-
Cority uses the employee’s main address (in the Home section) for all reports and documents, but you can capture any alternate address(es) on the Alternate Address tab.
-
GDDLOFB refers to the grouping of job/location-related demographic information (Geographic location, Department, Division, Location, Organization, Floor, Building). These are used throughout the Cority system. Be sure to capture the Health Centre the employee is associated with, to ensure only users with appropriate security permission can view this employee’s information.
-
The fields in the Additional Information section are available to capture information specific to your organization. The fields are labelled UDF (User Defined Field) by default, but may have been renamed by your system administrator.
Click Save.
At any time, you can click New to clear all the entries and start a new employee record.
To add (and later, to view) a photo of the employee, choose Actions»Photo. You can later Replace or Delete the photo from this form as well.
The Allergies tab displays all allergies recorded for this employee in the Demographics, Body Fluid Exposure, Medical Chart, Clinic Visits, Clinical Testing, or Immunization modules. For information about entering an allergy, see Recording Allergies.
The Rx tab displays all medications and contraindications recorded for this employee in the Demographics, Body Fluid Exposure, Medical Chart, Clinic Visits, Clinical Testing, or Immunization modules. For information about entering a medication or contraindication, see Recording Medications (non-eRx).
The Dx tab displays all medical diagnoses recorded for this employee in the Demographics, Medical Chart, Clinic Visits, Case Management, or Immunization modules. For information about entering a diagnosis, see Recording Medical Conditions.
The Restrictions tab displays all work restrictions recorded for this employee in the Demographic, Medical Chart, Clinic Visits, Case Management, Pulmonary, and Respirator Fit modules. For information about entering a work restriction, see Recording Work Restrictions.
To quickly end all listed restrictions, choose Actions»End All Active Restrictions.
The Surveillance tab displays any SEG information as it relates to the employee. For more information, see Associating an Employee with an SEG.
The Job Position tab allows you to record additional information about an employee's job position, associate the employee to multiple job positions, and identify the primary job position. This tab does not appear by default and must be added to the form layout.
The PPE tab shows all Personal Protective Equipment (PPEs) that are required by the employee. These have been assigned as part of an SEG that the employee belongs to.
The Job Position Capabilities tab displays the functional capabilities associated with the employee’s job. Capabilities are associated with jobs in the JobPosition look-up table.
To add information about the functional capabilities of the selected employee, select the capability in the list and enter/select the level (if necessary), the start and end dates, and any comments.